Juki 8700 Manual: A Comprehensive Guide
Date Accessed: 04/15/2026 15:36:58․ This manual provides detailed instructions, troubleshooting, and advanced techniques for optimal performance of your Juki 8700 sewing machine․
Welcome to the world of precision sewing with the Juki 8700! This industrial, high-speed lockstitch sewing machine is renowned for its reliability, durability, and exceptional performance․ Designed for a wide range of applications, from garment manufacturing to quilting and alterations, the Juki 8700 offers a powerful and consistent stitching experience․
This section serves as your initial guide to understanding the capabilities of this remarkable machine․ We will explore its core functionalities and highlight what sets it apart from other sewing machines in the market․ Understanding the Juki 8700’s strengths will empower you to tackle diverse sewing projects with confidence and achieve professional-quality results․ This manual, accessed on 04/15/2026, will be your constant companion throughout your Juki 8700 journey․
What is the Juki 8700 and its Applications?
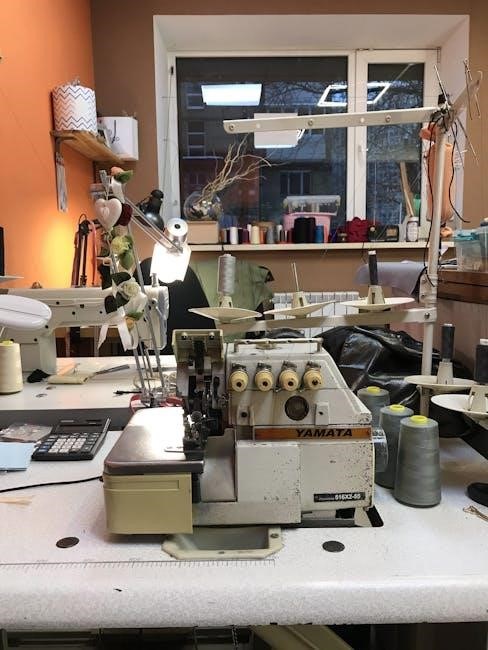
The Juki 8700 is a single-needle, lockstitch sewing machine celebrated within the industry for its high-speed capabilities and consistent stitch quality․ It’s a direct-drive machine, meaning the motor is directly connected to the needle bar, resulting in reduced noise and vibration, and increased energy efficiency․ This machine, referenced as of 04/15/2026, is a workhorse designed for heavy-duty use․
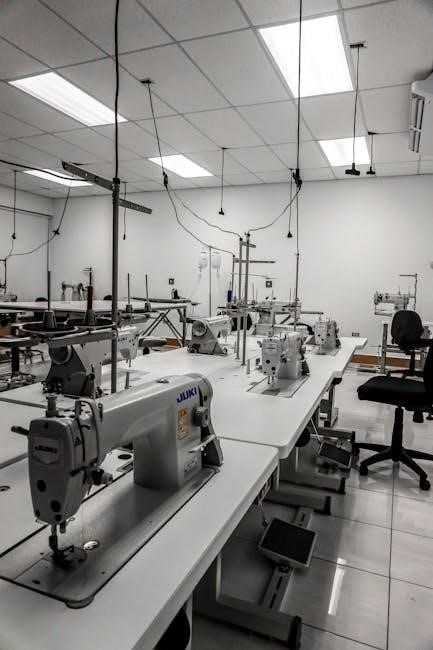
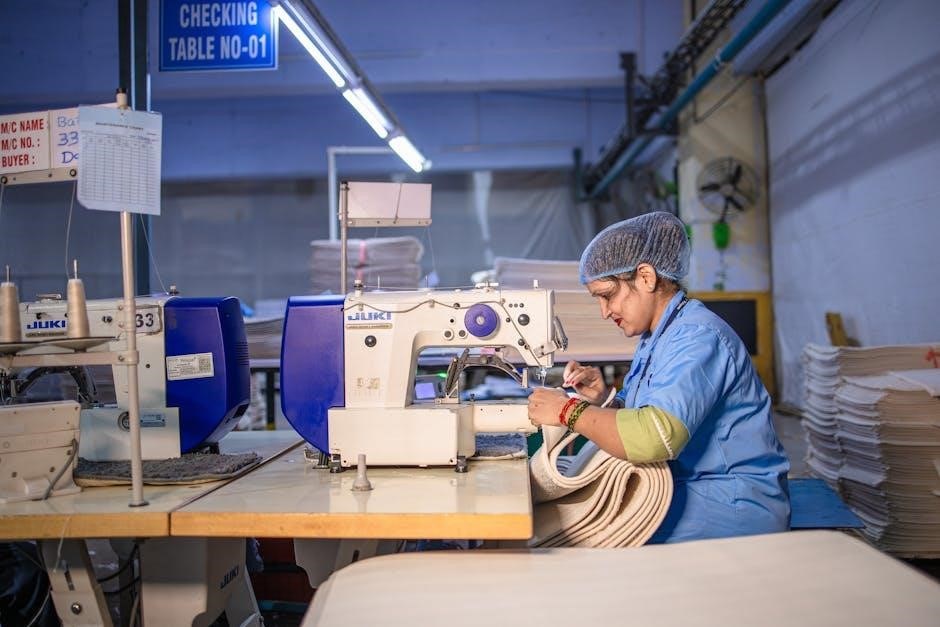
Its applications are incredibly diverse․ Commonly found in professional garment factories, it excels at sewing a wide array of fabrics – from lightweight silks to heavier denims․ Beyond apparel, the Juki 8700 is frequently utilized in the production of upholstery, automotive interiors, and various textile goods․ Its precision also makes it a favorite among quilters and those undertaking detailed sewing projects requiring accuracy and speed․
Key Features of the Juki 8700
As of 04/15/2026, the Juki 8700 boasts several standout features․ Its direct-drive motor ensures quiet operation and precise control, contributing to higher sewing quality․ The machine’s active needle cooling system prevents overheating, even during prolonged, high-speed sewing, extending the lifespan of components․ A large work area facilitates handling larger projects with ease․
Furthermore, the Juki 8700 incorporates an automated needle positioning function, enhancing accuracy and efficiency․ Its robust construction guarantees durability, capable of withstanding the demands of industrial environments․ The machine also features adjustable presser foot pressure, allowing for optimal fabric handling․ Combined, these features make the Juki 8700 a reliable and versatile choice for diverse sewing applications․
Setting Up Your Juki 8700
Date Accessed: 04/15/2026 15:36:58․ Proper setup is crucial for optimal performance; this section details unboxing, powering on, threading, and bobbin procedures for your Juki 8700․
Unboxing and Initial Inspection
Date Accessed: 04/15/2026 15:36:58․ Carefully unpack your Juki 8700 sewing machine, retaining all original packaging materials for potential future transport or warranty claims․ Begin by visually inspecting the machine for any signs of shipping damage – dents, scratches, or loose parts․
Verify that all included accessories are present, referencing the parts list in this manual․ These typically include various presser feet, bobbins, needle sets, a screwdriver, a seam ripper, and the power cord․
Check the machine’s overall condition, ensuring all covers and panels are securely attached․ Inspect the handwheel to confirm it rotates freely․ A thorough initial inspection now can prevent issues later, ensuring a smooth sewing experience with your new Juki 8700․ Document any discrepancies immediately with the retailer․
Powering On and Basic Settings
Date Accessed: 04/15/2026 15:36:58․ Before powering on your Juki 8700, ensure the power switch is in the ‘Off’ position․ Connect the power cord to a grounded outlet, verifying the voltage matches the machine’s requirements․ Turn the machine on using the power switch․
Initially, set the stitch selection to a straight stitch and the stitch length to a medium setting (typically 2․5mm); Adjust the needle position to the center․ Ensure the presser foot is down before beginning to sew, as this activates the tension mechanism․
Familiarize yourself with the speed control slider; start with a slower speed until comfortable․ Confirm the bobbin is correctly inserted (covered in the next section)․ These basic settings provide a safe starting point for test sewing and familiarization․
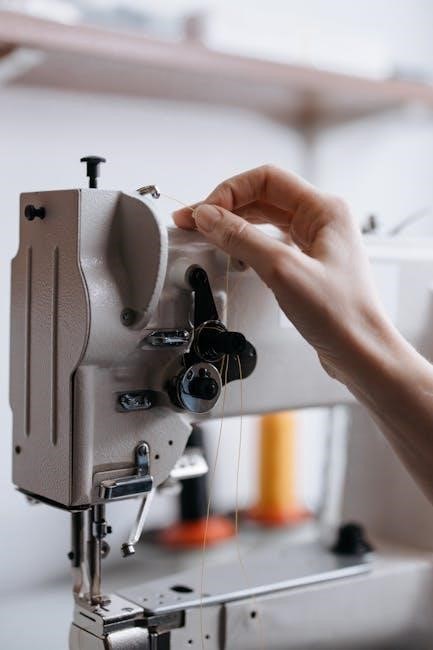
Threading the Juki 8700 – Step-by-Step
Date Accessed: 04/15/2026 15:36:58․ Begin with the machine turned off․ Raise the presser foot and the needle to its highest position․ Guide the thread from the spool, through the first thread guide, and then down into the tension discs – ensure it’s firmly seated between them․
Next, lead the thread up and around the take-up lever, then down through the second thread guide․ Continue threading through the needle clamp, from front to back․ Finally, thread the needle eye․
Always use the thread path diagram printed on the machine as a visual aid․ Incorrect threading will cause poor stitch quality․ Double-check each step to guarantee proper thread flow before commencing sewing․ A properly threaded machine is crucial for optimal performance․
Bobbin Winding and Insertion
Date Accessed: 04/15/2026 15:36:58․ To wind the bobbin, place the spool on the spool pin and guide the thread to the bobbin winder tension disc․ Engage the bobbin winder by sliding the bobbin onto the winder spindle and pushing it to the right․
Press the foot pedal gently to start winding; the machine will automatically stop when full․ Once wound, disengage the winder and remove the bobbin․
For insertion, open the bobbin cover․ Insert the bobbin into the bobbin case, ensuring the thread unwinds in the correct direction (clockwise or counterclockwise, as indicated by the machine)․ Draw up the thread through the tension spring and close the bobbin cover․ Proper bobbin winding and insertion are vital for balanced stitches․

Understanding Juki 8700 Controls
Date Accessed: 04/15/2026 15:36:58․ This section details the Juki 8700’s controls, covering needle position, stitch adjustments, tension, and presser foot pressure for precise sewing․
Needle Position and Adjustment
Date Accessed: 04/15/2026 15:36:58․ Precise needle positioning is crucial for achieving desired stitch results on the Juki 8700․ The machine allows for adjustments to both the vertical and horizontal needle positions․ Vertical adjustment impacts fabric penetration, especially vital when working with varying fabric weights – heavier fabrics require a slightly lower position․
Horizontal adjustments, controlled via dedicated dials, enable fine-tuning for cornering and intricate designs․ Always ensure the needle is securely clamped before making any adjustments․ Incorrect positioning can lead to skipped stitches or needle breakage․ Refer to the diagrams in the manual for specific locations of adjustment controls․ Regularly check the needle’s alignment to maintain optimal sewing performance and prevent damage to both the machine and your projects․ Proper needle positioning contributes significantly to stitch quality and overall sewing efficiency․
Stitch Length and Width Controls
Date Accessed: 04/15/2026 15:36:58․ The Juki 8700 offers independent control over stitch length and width, allowing for versatile sewing applications․ Stitch length, measured in millimeters, determines the distance between each stitch; shorter lengths are ideal for delicate fabrics and reinforcing seams, while longer lengths are suited for basting or gathering․
Stitch width controls the lateral extent of stitches, particularly relevant for zigzag and decorative patterns․ Adjusting width expands or compresses the stitch, influencing fabric coverage and aesthetic appeal․ Dials on the machine’s front panel provide precise adjustments․ Experimentation is key to finding optimal settings for different fabrics and desired effects․ Always test stitch settings on scrap fabric before beginning your project to ensure satisfactory results․ Incorrect settings can cause puckering or uneven stitching․
Tension Adjustment – A Detailed Look
Date Accessed: 04/15/2026 15:36:58․ Proper tension is crucial for balanced, professional-looking stitches on the Juki 8700․ Tension refers to the force applied to the upper and bobbin threads․ Incorrect tension results in looping, puckering, or thread breakage․ The Juki 8700 features both upper and bobbin tension controls, typically numbered dials․
Start with the factory settings and adjust the upper tension first․ If loops form on the underside of the fabric, increase upper tension․ Conversely, if loops appear on the top, decrease it․ Bobbin tension adjustments are less frequent but vital for specific fabrics․ Always test adjustments on scrap fabric matching your project material․ A balanced tension creates stitches where the threads interlock evenly within the fabric layers, ensuring seam strength and durability․
Presser Foot Pressure Settings
Date Accessed: 04/15/2026 15:36:58․ The Juki 8700’s presser foot pressure control is essential for achieving optimal stitch quality across diverse fabrics․ Insufficient pressure can cause fabric to feed unevenly, resulting in skipped stitches․ Excessive pressure may stretch or distort delicate materials․ The control dial, usually located at the back of the presser foot bar, allows you to adjust the downward force․
Lower the pressure for lightweight fabrics like silk or chiffon, and increase it for heavier materials like denim or canvas․ Always test the setting on a scrap piece of your project fabric․ Observe how the fabric feeds; it should move smoothly without puckering or resistance․ Correct pressure ensures consistent stitch formation and prevents damage to your materials, contributing to professional-quality results․

Stitch Selection and Usage
Date Accessed: 04/15/2026 15:36:58․ Explore the Juki 8700’s versatile stitch options, from basic straight and zigzag stitches to decorative patterns and a fully automated buttonhole feature․
Straight Stitch – Mastering the Basics
Date Accessed: 04/15/2026 15:36:58․
The Juki 8700’s straight stitch is foundational for numerous sewing projects, offering precision and durability․ Begin by selecting the straight stitch option on the machine’s stitch selection dial․ Adjust the stitch length according to your fabric weight and desired outcome; shorter stitches are ideal for delicate fabrics, while longer stitches suit heavier materials․
Ensure proper threading and bobbin insertion, as these directly impact stitch quality․ Practice on scrap fabric to fine-tune tension settings․ Consistent fabric feeding is crucial – use a walking foot for challenging materials like quilting cotton or multiple layers․
Pay attention to needle selection; a universal needle works well for many fabrics, but specialized needles enhance results with knits or denim․ Mastering the straight stitch unlocks a world of sewing possibilities, from garment construction to home décor projects․ Regular maintenance ensures consistent performance․
Zigzag Stitch – Applications and Techniques
Date Accessed: 04/15/2026 15:36:58․
The Juki 8700’s zigzag stitch offers versatility beyond simple seams․ Select the zigzag stitch and adjust both width and length for varied effects․ Narrow, short zigzag stitches are excellent for reinforcing edges and preventing fabric fraying, while wider, longer stitches create decorative embellishments․
This stitch is invaluable for sewing stretch fabrics, allowing the seam to expand with the material․ Utilize it for attaching elastic, creating buttonholes (in conjunction with the buttonhole foot), and appliqué work․ Experiment with different settings on scrap fabric to understand the impact on stitch appearance and functionality․
Proper tension is vital for a balanced zigzag stitch․ A test seam will reveal if adjustments are needed․ Mastering the zigzag stitch expands your sewing capabilities, enabling creative and practical solutions for diverse projects․
Decorative Stitches – Exploring Creative Options
Date Accessed: 04/15/2026 15:36:58․
The Juki 8700 boasts a range of decorative stitches, opening doors to personalized sewing projects․ Access these stitches via the stitch selection dial, referencing your manual for specific pattern details․ Experiment with varying stitch widths and lengths to dramatically alter the appearance of each design․
These stitches are ideal for embellishing garments, creating unique borders on home décor items, and adding flair to quilting projects․ Consider using contrasting thread colors to highlight the stitch pattern․ Stabilizers are often recommended when working with delicate fabrics to prevent puckering․
Always test stitch settings on scrap fabric before applying them to your final project․ Explore combining decorative stitches for truly original designs, and remember to consult the manual for foot recommendations․
Buttonhole Stitch – A Comprehensive Guide
Date Accessed: 04/15/2026 15:36:58․
The Juki 8700’s buttonhole function offers precision and consistency․ Begin by selecting the appropriate buttonhole stitch on the machine’s dial, consulting your manual for the correct setting based on button size․ Attach the buttonhole foot; it’s crucial for accurate results․ Place the button at the back of the foot as a guide․
The machine typically creates a multi-step buttonhole automatically․ Ensure fabric is stabilized, especially with stretch materials․ Test on scrap fabric first to verify size and density․ Adjust settings if needed․ After completion, carefully cut open the buttonhole, avoiding damage to the stitching․
Refer to the manual for detailed diagrams and troubleshooting tips․ Proper tension is vital for a professional finish․
Maintenance and Troubleshooting
Date Accessed: 04/15/2026 15:36:58․ Regular cleaning, lubrication, and understanding common error codes will ensure your Juki 8700 operates smoothly and reliably for years․
Regular Cleaning Procedures
Date Accessed: 04/15/2026 15:36:58․ Maintaining a clean Juki 8700 is crucial for optimal performance and longevity․ Begin by disconnecting the power supply before any cleaning․ Use a soft brush to remove lint and dust from the bobbin area, feed dogs, and needle plate after each use․
Periodically, a more thorough cleaning is required․ A small vacuum cleaner with a brush attachment can effectively remove accumulated debris․ Gently wipe down the exterior surfaces with a slightly damp cloth․ Avoid harsh chemicals or abrasive cleaners, as these can damage the machine’s finish․
Pay close attention to the needle bar area, ensuring it’s free of lint․ Regularly clean the tension discs with a soft brush to maintain consistent stitch quality․ Proper cleaning prevents jams, ensures accurate stitching, and extends the life of your Juki 8700․
Oil Points and Lubrication
Date Accessed: 04/15/2026 15:36:58․ Proper lubrication is vital for the smooth operation of your Juki 8700․ Refer to your machine’s diagram to identify designated oil points – typically found on the bobbin case, hook assembly, and various linkages․ Use only Juki-approved sewing machine oil; other oils can cause build-up and damage․
Apply oil sparingly, one drop at a time, to each oil point․ Avoid over-oiling, as excess oil attracts lint and debris․ After oiling, operate the machine slowly for a few minutes to distribute the lubricant․
Regularly check the oil levels and re-apply as needed, especially after extended use․ Lubrication reduces friction, minimizes wear and tear, and ensures consistent performance․ Always disconnect the power before lubricating your Juki 8700 to prevent accidental operation․
Common Problems and Solutions
Date Accessed: 04/15/2026 15:36:58․ Encountering issues with your Juki 8700 is common․ Thread bunching often indicates incorrect threading or tension adjustments – re-thread and check tension settings․ Skipped stitches can stem from a dull or incorrect needle; replace it with the appropriate type and size․
If the machine is noisy, lubrication may be needed (see Oil Points section)․ Fabric feeding problems could be due to a dirty feed dog or incorrect presser foot pressure․ Clean the feed dog and adjust pressure accordingly․
Always consult the troubleshooting section of your manual for specific error codes and solutions․ If problems persist, contact a qualified Juki service technician for assistance․ Regular maintenance prevents many issues․
Troubleshooting Error Codes
Date Accessed: 04/15/2026 15:36:58․ The Juki 8700 utilizes error codes to quickly diagnose issues․ Code E01 typically signals a motor overload; stop the machine and check for obstructions․ E02 indicates a thread jam – re-thread both upper and lower threads carefully․ Code E03 often relates to a bobbin winding problem; ensure the bobbin is correctly inserted and wound․
An E04 error suggests a control panel malfunction, requiring professional service․ E05 points to a potential sensor issue, also needing technician attention․ Always refer to the complete error code list in your Juki 8700 manual for detailed explanations and recommended actions․
Ignoring error codes can lead to further damage; address them promptly․

Advanced Techniques with the Juki 8700
Date Accessed: 04/15/2026 15:36:58․ Explore specialized techniques like free-motion quilting, utilizing optional presser feet, and computerized quilting for enhanced creative control․
Working with Different Fabrics
Date Accessed: 04/15/2026 15:36:58․
The Juki 8700 excels with a wide range of fabrics, but proper setup is crucial․ For lightweight materials like silk or chiffon, reduce presser foot pressure and use a finer needle (size 60/8 or 70/10)․ Adjust stitch length for optimal results; shorter stitches prevent puckering․
With medium-weight cottons and poly-blends, standard settings generally suffice․ However, always test on a scrap piece first! For heavier fabrics like denim or canvas, increase presser foot pressure and utilize a larger needle (size 90/14 or 100/16)․ Consider a walking foot to ensure even fabric feed․
Experiment with thread types – cotton for cottons, polyester for synthetics․ Consistent testing and minor adjustments will unlock the Juki 8700’s full potential across diverse textiles․
Using Optional Presser Feet
Date Accessed: 04/15/2026 15:36:58․
The Juki 8700’s versatility expands significantly with optional presser feet․ A walking foot is invaluable for quilting and handling multiple layers or slippery fabrics, ensuring even feeding․ The blind hem foot creates professional-looking hems, nearly invisible from the right side․
For decorative stitching, the open toe foot provides a clear view of the stitch field․ A satin stitch foot smooths satin stitches, preventing fabric sinking․ The buttonhole foot automates precise buttonhole creation․
Installing feet is straightforward: release the foot holder screw, remove the existing foot, and snap the new foot into place․ Refer to your Juki 8700 manual for specific foot compatibility and recommended settings․ Utilizing these feet unlocks advanced sewing capabilities․
Free Motion Quilting with the Juki 8700
Date Accessed: 04/15/2026 15:36:58․
The Juki 8700 excels in free motion quilting (FMQ)․ First, detach the feed dogs using the designated lever․ Attach a free motion quilting foot – often a hopping foot – which allows the fabric to move freely․ Lower the presser foot and gently guide the fabric, creating desired designs․
Adjust stitch length to zero and select a comfortable sewing speed․ Practice on scrap fabric to develop muscle memory․ Consistent hand movement is key․ Experiment with different threads and batting for varied effects․
The Juki 8700’s powerful motor and precise control make intricate FMQ patterns achievable․ Remember to raise the feed dogs when returning to standard sewing․ Consult your manual for detailed FMQ setup instructions․
Juki 8700 and Computerized Quilting
Date Accessed: 04/15/2026 15:36:58․
The Juki 8700 seamlessly integrates with computerized quilting systems, enhancing precision and efficiency․ When connecting to a quilting machine, ensure compatibility with the Juki 8700’s interface․ Utilize the machine’s consistent stitch quality for flawless computerized designs․
Proper setup involves calibrating the machine to the computer system, ensuring accurate pattern transfer․ The Juki 8700’s robust construction handles the demands of prolonged computerized operation․ Regularly check thread tension and needle alignment for optimal results․
Explore software options for creating and importing quilting patterns․ The machine’s speed and power contribute to faster completion times․ Refer to the computerized quilting system’s manual for specific Juki 8700 integration instructions․