The Monogram oven represents a blend of style, convenience, and flexible kitchen planning․ This manual serves as a personal tutor, guiding users through operation․
GE Monogram ovens, detailed in manuals like the ZET857/837 installation guides, offer advanced features․ Consumer information is readily available online at monogram․com․
Overview of Monogram Ovens
Monogram ovens are designed as a statement piece, seamlessly integrating style and functionality into modern kitchens․ These 27 and 30-inch convection wall ovens (models ZET857 & ZET837) offer a range of features detailed in comprehensive owner’s manuals and installation instructions․
GE provides extensive documentation, including PDF downloads (3․1 MB) and model-specific guides, ensuring users can fully utilize their appliance․ The manuals cover everything from initial setup to detailed operation, emphasizing a user-friendly experience․ GE’s commitment to quality is reflected in the oven’s design and the thoroughness of its accompanying literature, available at www․monogram․com․
Key Features and Benefits
Monogram ovens boast advanced cooking technologies, enhancing culinary precision and convenience․ Manuals highlight features like convection baking and roasting, alongside specialized modes such as proofing, detailed in guides for models ZET857 and ZET837․
Benefits include flexible installation options – built-in designs seamlessly integrate into kitchen layouts․ GE’s documentation emphasizes ease of use, with clear instructions for the control panel and self-cleaning cycles․ Accessing resources like the GE Answer Center (800․626․2000) and online manuals ensures optimal performance and a superior cooking experience․

Safety Information
Always read instructions carefully before operation․ Proper electrical connection and ventilation are crucial for safe use, as detailed in the installation guides․
Important Safety Precautions
Prioritize safety when using your GE Monogram oven․ Carefully review all instructions before initial operation to understand potential hazards․ Ensure the oven is properly installed according to the provided installation guides (ZET857, ZET837 models)․ Never attempt to modify or repair the oven yourself; contact GE Customer Support for assistance․
Avoid using harsh abrasives during cleaning, as they can damage the oven’s interior․ Always disconnect power before performing any maintenance․ Supervise children when the oven is in use, and never allow them to operate it unsupervised․ Be mindful of hot surfaces and use oven mitts to prevent burns․
Electrical Connection Requirements
Proper electrical connection is crucial for safe and efficient operation of your GE Monogram oven․ Installation must adhere to local electrical codes and regulations․ The oven requires a dedicated electrical circuit, typically 240V, and appropriate amperage – consult the model-specific installation guide (ZET857/ZET837) for exact specifications․
Ensure the electrical supply is adequately grounded․ Incorrect wiring can pose a serious safety hazard․ Do not use extension cords or adapters․ A qualified electrician should perform the electrical connection․ Verify voltage compatibility before connecting the oven to prevent damage or malfunction․ Improper installation voids the warranty․
Proper Oven Ventilation
Maintaining adequate oven ventilation is essential for safe and optimal performance of your GE Monogram oven․ Ensure the oven is installed with sufficient clearance around it, as detailed in the installation instructions for models like ZET857 and ZET837․ This allows for proper heat dissipation and prevents overheating of surrounding cabinetry․
Do not block the oven’s ventilation openings․ Improper ventilation can affect baking results and potentially damage the oven․ Always operate the oven in a well-ventilated kitchen area․ Follow all guidelines outlined in the owner’s manual to ensure safe and efficient operation․
Oven Control Panel
The Monogram oven’s control panel features an intuitive display and electronic controls․ Understanding these functions, as detailed in the manual, is key to operation․
Understanding the Display
The GE Monogram oven display provides crucial information during operation․ It clearly shows the set temperature, cooking mode selected (bake, broil, convection, etc․), and remaining cook time․ Error codes, should they occur, are also prominently displayed for easy troubleshooting․
The display’s brightness and contrast are typically adjustable to suit user preference․ Some models may feature a touchscreen interface, offering intuitive control․ Refer to your specific model’s manual for detailed instructions on navigating the display and interpreting its various indicators․ Familiarizing yourself with the display’s functions will significantly enhance your cooking experience․
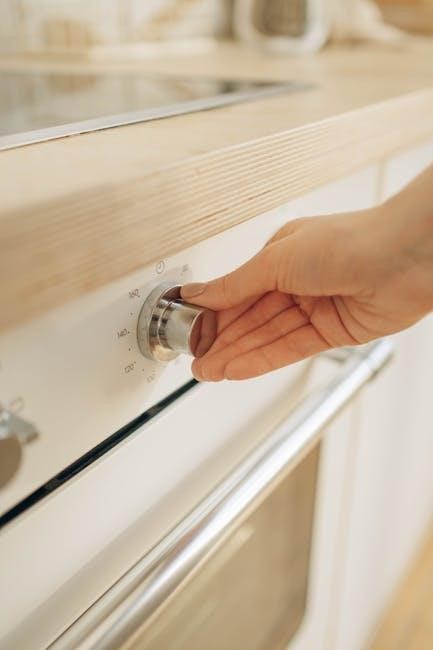
Control Knob Functions
GE Monogram ovens often utilize control knobs for precise temperature and timer adjustments․ These knobs allow for incremental changes, offering a tactile and responsive control experience․ Rotating the temperature knob sets the desired cooking temperature, while the timer knob establishes the cooking duration․
Some models feature multi-function knobs, combining temperature and mode selection into a single control․ The manual details specific knob functions for each model․ Proper use of these knobs ensures accurate cooking results; Always confirm settings on the display before initiating a cooking cycle․
Electronic Oven Controls
GE Monogram ovens feature sophisticated electronic controls, often displayed on a vivid LCD screen․ These controls manage cooking modes, temperature settings, and timer functions with precision․ The display provides clear feedback on selected options and oven status․
Electronic controls allow for programmed cooking, delayed start, and precise temperature maintenance․ The manual details navigating the control panel, understanding error codes, and utilizing advanced features․ Utilizing these controls ensures optimal performance and consistent cooking results․ Refer to the manual for model-specific instructions․
Cooking Modes
Monogram ovens offer versatile cooking modes like Bake, Broil, Convection Bake, and Convection Roast․ The manual details operation of each, including a dedicated Proofing Mode guide․
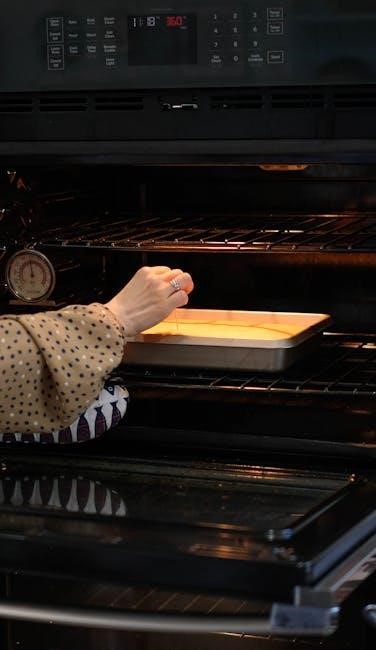
Bake Mode Operation
Utilizing Bake mode on your GE Monogram oven provides traditional, even heating for a wide variety of dishes․ To initiate, simply select “Bake” via the electronic controls, then set your desired temperature using the control knob․ The oven’s manual emphasizes preheating for optimal results, ensuring consistent cooking throughout․
Remember to position oven racks appropriately based on your recipe’s recommendations; For best outcomes, avoid opening the oven door frequently during the baking process, as this can cause temperature fluctuations․ The manual also suggests using appropriate bakeware for even heat distribution․ Always consult the full user manual for detailed instructions and safety guidelines related to Bake mode operation․
Broil Mode Instructions
The Broil mode on your GE Monogram oven delivers intense, direct heat from above, ideal for browning and finishing dishes․ Before broiling, position the oven rack to the desired level – closer for more intense heat, further for less․ The manual stresses the importance of using broil-safe cookware․
Always keep the oven door slightly ajar during broiling to prevent overheating and ensure proper ventilation․ Monitor food closely, as broiling happens quickly․ The GE Monogram manual advises against using broil for extended periods․ For detailed safety precautions and specific broiling times, refer to the comprehensive user guide․
Convection Bake Explained
Convection Bake utilizes a fan to circulate hot air throughout the oven, resulting in faster, more even cooking․ The GE Monogram oven manual highlights that this mode is perfect for baking multiple items simultaneously or achieving consistent results across all racks․
When using Convection Bake, it’s generally recommended to reduce the baking temperature by 25°F compared to traditional bake settings․ The circulating air efficiently transfers heat, shortening cooking times․ Refer to the manual for specific convection baking guidelines and adjustments for various recipes․ Proper rack placement is also crucial for optimal performance․
Convection Roast Details
Convection Roast, as detailed in the GE Monogram oven manual, employs a fan to circulate hot air around the food while roasting, creating crispy exteriors and juicy interiors․ This mode excels at cooking larger cuts of meat, poultry, and vegetables efficiently․
Unlike standard roasting, convection roast often requires slightly lower temperatures and shorter cooking times; The manual suggests monitoring the internal temperature of the food with a meat thermometer for precise results․ Ensure adequate space around the food for optimal air circulation․ Proper pan selection is also important for even browning․
Proofing Mode Guide
The GE Monogram oven manual details the Proofing mode, designed to create a warm, humid environment ideal for yeast doughs to rise․ This feature ensures consistent and reliable proofing, crucial for baking breads, rolls, and pastries․
To utilize Proofing mode, simply select it on the electronic oven controls․ The oven maintains a low, consistent temperature, typically around 80-90°F, and introduces humidity to prevent the dough from drying out․ Place the dough in a covered container within the oven․ Refer to your recipe for specific proofing times, and monitor dough for desired rise․

Self-Cleaning Cycle
The GE Monogram oven manual outlines procedures for preparing, running, and completing the self-clean cycle, ensuring a spotless oven interior with minimal effort․
Preparing for Self-Clean
Before initiating the self-clean cycle on your GE Monogram oven, careful preparation is essential for optimal results and safety․ The oven manual stresses removing all racks, broiler pans, and any aluminum foil from the oven cavity․
Wipe up any large spills or loose debris, as these can create excessive smoke during the high-temperature cleaning process․ Ensure the oven door can fully close and latch securely․
The surrounding kitchen area should be well-ventilated, and pets should be kept away, as the cycle generates significant heat and fumes․ Review the manual for specific model instructions regarding self-clean preparation․
Running the Self-Clean Cycle
To begin the self-clean cycle on your GE Monogram oven, consult the oven’s control panel instructions detailed in the user manual․ Typically, this involves pressing the “Self-Clean” button and selecting the desired cycle length – often ranging from 2 to 4 hours․
Once initiated, the oven door automatically locks for safety and remains locked throughout the entire process․ Avoid opening the door mid-cycle, as extremely high temperatures are present․
The manual advises against operating the oven during self-clean․ A burning odor is normal, but excessive smoke indicates a problem; immediately stop the cycle․
Post-Self-Clean Procedures
After the self-clean cycle completes, allow the oven to cool completely before unlocking the door․ Do not attempt to force it open․ A small amount of ash may remain; this is normal and can be easily wiped away with a damp cloth, as detailed in the care and cleaning section of the manual․
Ensure adequate ventilation during and after the cycle to dissipate any lingering odors․ Inspect the oven cavity for any damage․
The GE Monogram manual stresses the importance of avoiding abrasive cleaners post-clean, as they can damage the oven’s interior․

Care and Cleaning
The GE Monogram manual details cleaning procedures for the oven interior, burner assembly, griddle, grilles, and broiler pan/grid․ Regular maintenance ensures optimal performance․
Cleaning the Oven Interior
Maintaining a clean oven interior is crucial for both performance and hygiene․ The GE Monogram oven manual provides detailed instructions for this process․ Before commencing, ensure the oven is cool and disconnected from power․ Gentle cleaning solutions are recommended to avoid damaging the oven’s surfaces․
Avoid abrasive cleaners or scouring pads, as these can scratch the enamel․ For light spills, a damp cloth often suffices․ For baked-on residue, a paste of baking soda and water can be applied, left to sit, and then gently wiped away․ Always rinse thoroughly with clean water after cleaning, and dry with a soft cloth․
Burner Assembly Cleaning
The GE Monogram oven manual details proper burner assembly cleaning procedures for optimal performance․ Before any cleaning, ensure the oven is completely cool and the power is disconnected – safety first! Carefully remove the burner assembly following the manual’s illustrated steps․
Inspect the burner ports for any blockages caused by food debris or spills․ Use a small wire or needle to gently clear any obstructions․ Avoid enlarging the ports․ Wipe down the assembly with a damp cloth and mild detergent, ensuring it’s thoroughly dry before reinstallation․ Proper cleaning maintains efficient heating․
Griddle Cleaning Instructions
The GE Monogram oven manual provides specific griddle cleaning instructions to ensure longevity and optimal cooking performance․ Always allow the griddle to cool completely before attempting to clean it․ Remove any loose food particles with a soft scraper․
For stubborn residue, use a griddle cleaning solution specifically designed for non-stick surfaces, following the product’s directions․ Avoid abrasive cleaners or scouring pads, as these can damage the griddle’s surface․ Wipe clean with a damp cloth and dry thoroughly before storing or reinstalling․ Regular cleaning prevents buildup․
Grille Cleaning Procedures
The GE Monogram oven manual details proper grille cleaning to maintain performance and hygiene․ Begin by removing the grille and allowing it to cool completely․ For light cleaning, wash the grille with warm, soapy water and a non-abrasive sponge․
Stubborn, baked-on food may require soaking the grille in hot, soapy water for an extended period․ Avoid using harsh chemicals or abrasive cleaners, which can damage the finish․ Rinse thoroughly and dry completely before replacing it in the oven․ Regular cleaning prevents grease buildup and ensures even cooking․
Broiler Pan and Grid Maintenance
The GE Monogram oven manual emphasizes regular maintenance of the broiler pan and grid for optimal performance and safety․ After each use, allow both components to cool completely before cleaning․ Remove any excess grease or food particles with a paper towel․
For thorough cleaning, wash the broiler pan and grid with warm, soapy water․ Stubborn residue may require soaking․ Avoid abrasive cleaners that could damage the finish․ Ensure both are completely dry before reassembling and storing․ Proper maintenance extends the lifespan and ensures efficient broiling․
Troubleshooting Common Issues
The GE Monogram oven manual assists with issues like heating problems or control panel malfunctions․ Error codes provide diagnostic clues for swift resolution․
Oven Not Heating
If your GE Monogram oven isn’t heating, consult the user manual for troubleshooting steps․ First, verify the oven is properly connected to a functioning power source and the circuit breaker hasn’t tripped․ Check the control panel to ensure a cooking mode is selected and the temperature is set correctly․
Review the manual for specific error codes displayed, as these pinpoint potential issues․ A faulty bake element or igniter could be the cause, requiring professional service․ The manual details how to access diagnostic tests, if available on your model․ Contact GE’s customer support at 800․626․2000 for further assistance if self-troubleshooting fails․
Error Codes and Meanings
GE Monogram oven manuals emphasize the importance of understanding error codes for efficient troubleshooting․ These codes, displayed on the control panel, indicate specific malfunctions within the oven system․ The manual provides a comprehensive list detailing each code’s meaning, ranging from sensor failures to heating element issues․
Referencing the code list allows users to identify the problem before contacting service․ Some codes may indicate minor issues resolvable by resetting the oven, while others signal the need for professional repair․ Always consult the manual for the precise interpretation of each error code specific to your Monogram model․

Control Panel Malfunctions
GE Monogram oven manuals address potential control panel issues, ranging from unresponsive buttons to display errors․ If the panel fails to illuminate or respond, first check the electrical connection and breaker․ A frozen display often requires a reset – typically by briefly disconnecting power to the oven․
Erratic behavior or incorrect readings may indicate a faulty control board, necessitating professional service․ The manual advises against attempting self-repair of electronic components․ Document any error messages or unusual behavior before contacting GE customer support for assistance with diagnosis and repair options․
Installation Information
GE Monogram ovens require careful built-in installation, as detailed in model-specific guides (ZET857, ZET837)․ Always read instructions completely before beginning!
Built-In Oven Installation
Proper installation is crucial for optimal performance and safety of your GE Monogram built-in oven․ Before commencing, thoroughly review the installation instructions provided with your specific model – ZET857SYSS, ZET857DYSB, ZET857BYBB, ZET857WYWW, ZET837SYSS, ZET837DYSB, ZET837BYBB, or ZET837WYWW․
Ensure the surrounding cabinetry meets the dimensional requirements outlined in the manual․ Electrical connections must adhere to local codes and the specifications detailed within the guide․ Carefully follow each step, paying close attention to securing the oven properly within the designated space․ Incorrect installation can compromise functionality and potentially create a safety hazard․
Model Specific Installation Guides (ZET857, ZET837)
GE Monogram provides dedicated installation guides for the ZET857 and ZET837 series ovens, ensuring a precise and safe setup․ These guides, available for models like ZET857SYSS, ZET857DYSB, and ZET837WYWW, detail specific dimensions, electrical requirements, and cabinetry considerations․
Refer to the appropriate manual for your exact model number to avoid errors․ The guides emphasize the importance of reading all instructions before beginning installation․ They cover securing the oven, proper venting, and verifying correct operation post-installation․ Following these model-specific instructions guarantees optimal performance and adherence to safety standards․

Warranty Information
GE Monogram ovens are covered by a specific warranty; details are available in the owner’s manual․ Contact GE Customer Support at 800․626․2000 for assistance․
Monogram Oven Warranty Details
The GE Monogram oven warranty provides coverage for defects in materials and workmanship․ Specific terms and durations vary by model, so consulting your owner’s manual is crucial․ Generally, the warranty covers parts and labor for a defined period from the original purchase date․
Extended warranties may also be available for purchase, offering additional protection beyond the standard coverage․ Registration of your appliance is recommended to streamline any potential warranty claims․ Keep your proof of purchase readily accessible, as it’s required for service․ For complete details and claim procedures, refer to the warranty documentation included with your oven or visit the GE Appliances website․
Contacting GE Customer Support
For assistance with your GE Monogram oven, several support channels are available․ The GE Answer Center can be reached by phone at 800․626․2000 for immediate help with questions or concerns․ Online resources, including FAQs and troubleshooting guides, are accessible on the GE Appliances website (monogram․com)․
You can also find model-specific manuals and documentation for ovens like the ZET857 and ZET837 online․ For complex issues or warranty claims, contacting customer support directly is recommended․ Ensure you have your model and serial number handy when reaching out to expedite the process․