Welcome to the GE Clothes Dryer Manual! This guide provides essential information for safe and efficient use, highlighting features, installation, and maintenance tips to ensure optimal performance.
1.1 Importance of Reading the Manual
Reading the GE Clothes Dryer Manual is crucial for safe and efficient operation. It provides essential safety precautions, installation guidelines, and maintenance tips to prevent accidents and ensure optimal performance. The manual also includes troubleshooting steps and warranty details, helping you resolve issues quickly and understand your coverage. By following the instructions, you can extend the dryer’s lifespan and enjoy reliable service. Always refer to the manual before installation or operation to ensure everything runs smoothly and safely.
1.2 GE Appliances Commitment to Quality
GE Appliances is dedicated to delivering high-quality products that meet rigorous standards. The clothes dryer is designed with innovative technology, durable materials, and user-friendly features to ensure reliability and performance. GE’s commitment to quality is reflected in its attention to detail, extensive testing, and focus on customer satisfaction. By prioritizing excellence, GE Appliances aims to provide appliances that enhance your daily life and stand the test of time, building trust and loyalty with every product.
1.3 Safety Precautions and Warnings
Ensure your safety and the longevity of your GE Clothes Dryer by adhering to essential precautions. Always follow installation guidelines to avoid electrical hazards and properly vent the dryer to prevent fires. Never overload the dryer or leave it unattended during operation. Avoid drying flammable materials or items with metal parts. Regularly clean the lint filter and venting system to maintain efficiency and safety. Failure to comply with these warnings may result in appliance damage or personal injury. Always prioritize caution when using your dryer.

Safety Guidelines for GE Clothes Dryer
Adhere to safety guidelines for optimal performance and hazard prevention. Proper installation, usage, and maintenance ensure safe operation and extend the dryer’s lifespan. Always follow instructions.
2.1 Installation Safety Tips
Ensure a safe installation process by following these guidelines. Place the dryer on a level, stable surface away from flammable materials. Install vents securely to prevent leaks. Never overload electrical circuits, and use a grounded outlet. Keep the area clear during installation to avoid accidents. Always follow the manufacturer’s instructions and local building codes. Check for any damage to the dryer or venting system before use. Proper installation ensures safe and efficient operation of your GE clothes dryer.
2.2 Usage Safety Instructions
Always check pockets for flammable items like matches or tissues before drying. Never dry fabrics with rubber backing or PVC materials. Avoid overloading the dryer to prevent damage. Keep children away during operation. Ensure proper venting to avoid carbon monoxide buildup. Do not leave the dryer unattended while in use. Clean the lint filter after each use to reduce fire risks. Follow the recommended fabric care labels for safe drying. Regularly inspect and maintain the dryer to ensure safe operation.
2.3 Fire Prevention Measures
To prevent fires, always clean the lint filter after each use and ensure proper ventilation. Never bend or restrict the vent hose, as this can cause blockages. Regularly inspect and clean the venting system to remove lint buildup. Avoid overloading the dryer, as this can increase heat levels. Do not dry items with combustible materials or those exposed to flammable substances. Keep the dryer area clear of clutter and never leave it unattended during operation. Clean the moisture sensor and dryer vent annually.
2.4 Proper Ventilation Requirements
Proper ventilation is essential for safe and efficient dryer operation. Use a smooth, rigid vent hose with a diameter of at least 4 inches. Ensure the vent is free of bends and securely connected to both the dryer and exterior vent. The vent should extend directly outdoors, not into attics, crawl spaces, or insulated areas. Check local building codes for specific requirements. Clean the venting system regularly to prevent lint buildup. Proper ventilation reduces moisture, improves efficiency, and ensures safe operation.

Features of GE Clothes Dryer
GE clothes dryers offer advanced features like Smart HQ app control, moisture-sensing technology, and multiple drying modes for efficient, customized fabric care. Designed for convenience and performance.
3.1 Capacity and Size Options
GE clothes dryers are available in various capacities, ranging from 7.2 cu. ft. to 7.4 cu. ft., ensuring ample space for large or small loads. Compact models are ideal for tight spaces, while standard sizes fit seamlessly into most laundry rooms. The dryers are designed to accommodate bulky items like comforters and pillows, making them versatile for diverse household needs. Whether you prefer a stacked configuration or side-by-side setup, GE offers flexible sizing options to meet your specific requirements.
3.2 Energy Efficiency and Settings
GE clothes dryers are designed with energy efficiency in mind, offering settings that minimize energy consumption while ensuring optimal drying performance. Many models are Energy Star certified, reducing utility costs and environmental impact. Advanced moisture-sensing technology automatically adjusts drying time, preventing over-drying and saving energy. Users can choose eco-friendly settings for lighter loads or select energy-saving modes for extended drying cycles. These features help balance efficiency and performance, making GE dryers a practical choice for eco-conscious households.
3.3 Smart Technology Integration
GE clothes dryers now feature smart technology integration, enhancing convenience and control. Compatible with the GE Smart HQ app, users can monitor and manage drying cycles remotely. Voice control through Amazon Alexa or Google Assistant allows hands-free operation. The dryer can also adjust settings based on energy usage patterns, optimizing performance. Remote diagnostics enable quick troubleshooting, reducing downtime and ensuring seamless operation. This advanced integration makes GE dryers a modern, user-friendly choice for smart homes.
3.4 Special Drying Modes (Steam, Sanitize, etc.)
GE clothes dryers offer advanced special drying modes to cater to diverse fabric care needs. The Steam mode gently removes wrinkles and reduces odors without additional ironing. Sanitize mode uses high heat to kill bacteria and allergens, ideal for cleaning delicate or heavily soiled items. Additional modes like Refresh and Dewrinkle help restore freshness and reduce wrinkles in garments without full cycles. These specialized settings ensure optimal fabric care and versatility for various laundry requirements.

Installation and Setup
Proper installation ensures safety and efficiency. Prepare the site, align with washer, secure connections, and level the dryer. Ensure all components are correctly positioned for optimal performance.

4.1 Preparing the Installation Site
Choose a well-ventilated, dry location for your dryer. Ensure the floor is level, sturdy, and away from direct sunlight. Clear the area of clutter and flammable materials. Allow sufficient space around the dryer for proper airflow. Ensure proximity to a water supply for steam models and access to a drain if required. Verify that electrical connections meet the dryer’s specifications. Proper site preparation ensures safe and efficient operation of your GE clothes dryer.
4.2 Venting Requirements and Recommendations
Proper venting is essential for safe and efficient dryer operation. Use a rigid metal duct, avoiding flexible plastic ducts, to prevent fire hazards. Ensure the vent system is the correct length, as specified in local building codes. Install a screen or grille at the exterior vent to prevent debris buildup. Keep the vent clear of obstructions and ensure it slopes slightly upward to prevent moisture accumulation. Regularly inspect and clean the vent system to maintain airflow and prevent fires. Always follow local regulations and manufacturer guidelines for installation.
4.3 Electrical Connections and Power Requirements
Your GE clothes dryer requires a dedicated 240-volt electrical connection. Use a 4-prong cord or hardwire it directly, depending on the model. Ensure the circuit breaker or fuse box is rated for the dryer’s amperage, typically 30 amps. Avoid using extension cords or adapters, as they can cause overheating. Always connect the dryer to a grounded outlet to prevent electrical hazards. Check local electrical codes and consult a licensed electrician if unsure. Proper installation ensures safe and efficient operation of your dryer.
4.4 Leveling the Dryer for Optimal Performance
Proper leveling ensures your GE clothes dryer operates smoothly and reduces vibration noise. Use the adjustable legs to level the dryer on a firm, even surface. Place a spirit level on top of the dryer to check balance. Adjust the legs until the level indicates even positioning. Ensure the dryer is stable and plumb to prevent uneven drying and potential damage. After leveling, spin the drum by hand to confirm it rotates freely and evenly.
Operating the GE Clothes Dryer
Operating your GE dryer involves selecting the right cycle, adding clothes, closing the door, and starting the machine. Ensure the lint filter is clean and monitor progress for optimal drying results.
5.1 Selecting the Right Drying Cycle
Choosing the correct drying cycle ensures optimal results for your fabrics. GE dryers offer options like Delicates, Normal, and Heavy Duty, tailored to fabric types and soil levels. Select Delicates for lingerie or wool, Normal for everyday clothes, and Heavy Duty for bulky items. Adjust settings based on load size and fabric care labels to prevent damage and extend garment life. Proper cycle selection enhances drying efficiency and maintains fabric quality.
5.2 Using the Timer and Delay Start Features
The timer allows precise control over drying time, ensuring clothes are dry without over-drying. The delay start feature lets you schedule cycles up to 24 hours in advance, offering flexibility to run the dryer during off-peak hours or when convenient. Use the control panel to set the timer and delay start, optimizing your schedule and energy usage. These features enhance convenience and help manage household tasks efficiently.
5.3 Understanding the Control Panel Layout
The control panel on your GE clothes dryer is designed for intuitive operation. It features a clear display, buttons for cycle selection, and knobs for temperature control. Key components include the power button, start/stop button, and options for special features like steam or sanitize. The panel is user-friendly, with logically arranged buttons and LED indicators to show selected settings. Familiarizing yourself with the layout ensures easy operation and customization of drying cycles to meet your needs effectively.
5.4 Steam Function and Its Benefits
The steam function on your GE clothes dryer uses steam to penetrate fabrics, effectively reducing wrinkles and odors. It helps sanitize clothes and refresh non-washable items. The steam cycle is gentle on fabrics, making it ideal for delicate or special-care items. Regular use can extend the life of your clothes by minimizing wear from repeated washing. For best results, ensure proper water supply and follow the recommended steam settings for different fabric types.

Maintenance and Care
Regular maintenance ensures optimal performance and safety. Clean the lint filter after each use, inspect vent systems, and check belts for wear. Refer to your manual for detailed care instructions and schedules to keep your dryer running efficiently.
6.1 Cleaning the Lint Filter
Cleaning the lint filter after each use is crucial for maintaining your GE clothes dryer’s efficiency and safety. Locate the filter in the dryer door opening or drum. Pull it out and remove accumulated lint by hand or with a soft brush. For deeper cleaning, wash it with mild soap and warm water, then dry thoroughly before reinstalling. Regular cleaning prevents lint buildup, reduces fire risks, and ensures proper airflow. Always refer to your manual for specific instructions tailored to your model.
6.2 Checking and Cleaning Vent Systems
Regularly inspect and clean the venting system to ensure proper airflow and prevent blockages. Use a vacuum or vent-cleaning brush to remove lint and debris from the ducts. Check the exterior vent cover for obstructions and ensure it opens freely. Clean or replace damaged or kinked vent hoses to maintain efficiency. Blocked vents can increase drying times and energy consumption, so schedule cleaning every 3-6 months or after heavy use. Always follow the manufacturer’s guidelines for venting maintenance.
6.3 Maintaining the Dryer Drum
Regularly inspect the dryer drum for damage, such as cracks or dents, and clean it to prevent lint buildup. Use a soft brush or cloth to remove residue from fabric softeners or detergents. Avoid harsh chemicals, as they may damage the drum’s finish. Ensure the drum is dry after cleaning to prevent rust. For stubborn stains, mix equal parts water and white vinegar on a soft cloth and gently wipe the surface. Never use abrasive cleaners or bleach, as they can harm the drum’s protective coating.
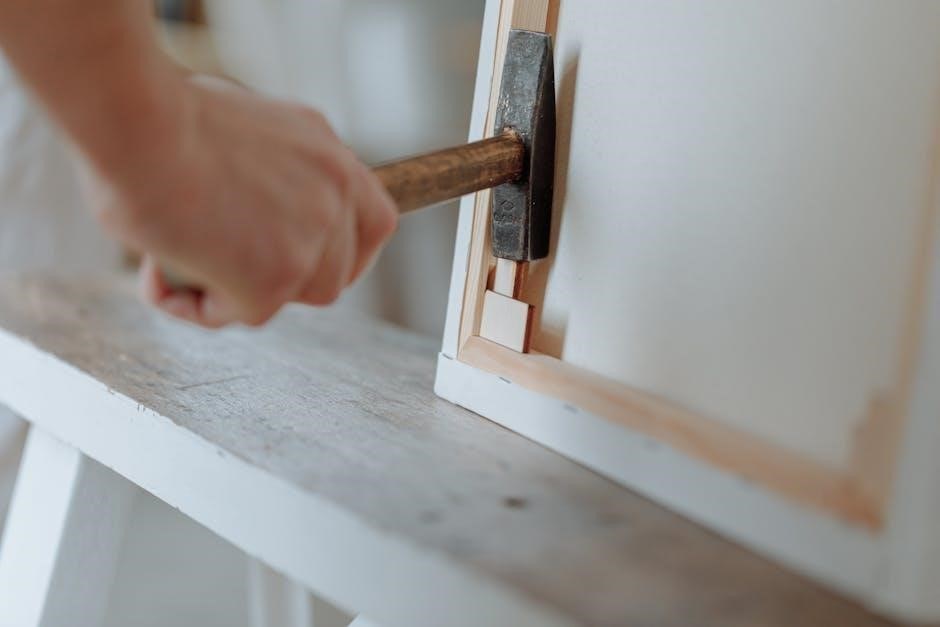
6.4 Replacing the Drive Belt
To replace the drive belt, first disconnect power to the dryer for safety. Access the belt by removing the back panel or top cover, depending on your model. Purchase a genuine GE replacement belt to ensure compatibility. Carefully loop the new belt around the pulleys, following the manual’s diagram for proper routing. Tighten the belt evenly and reassemble the dryer. Test the dryer to ensure smooth operation. If unsure, consult a professional or refer to the manual for specific instructions.
Troubleshooting Common Issues
This section helps diagnose and resolve common problems with your GE dryer, such as overheating, noise, or malfunctioning controls, ensuring optimal performance and longevity.
7.1 Dryer Not Heating
If your GE clothes dryer isn’t heating, check the power supply, ensure the dryer is plugged in, and verify that the circuit breaker hasn’t tripped; Select the correct heat setting on the control panel, as some cycles operate without heat. A clogged vent or lint filter can prevent heating, so clean both regularly. Inspect the heating element for damage or wear. If issues persist, contact a professional to diagnose and repair internal components like the thermal fuse or heating element.
7.2 Dryer Not Starting
If your GE dryer won’t start, first ensure it’s properly plugged into a functioning outlet. Check the circuit breaker or fuse box to confirm the power supply isn’t interrupted. Verify that the door is fully closed, as the safety switch prevents operation when open. Ensure the start button is pressed firmly and the correct cycle is selected. If using a delay start, check the timer settings. Reset the dryer by unplugging it for 30 seconds and plugging it back in. If issues persist, contact a certified technician for assistance.
7.3 Strange Noises During Operation
If your GE dryer produces unusual noises during operation, check for blockages in the lint filter or venting system, as these can cause vibration or rattling sounds. Ensure the dryer is level, as an unbalanced unit may vibrate excessively. Foreign objects like coins or buttons in the drum can also create noise. If the noise persists, inspect the belt or drum rollers for wear. Contact a professional if the issue continues after these checks.
7.4 Issues with the Drum or Belt
If the drum is damaged or cracked, it may cause clothes to tear or create uneven drying. Inspect the drum for signs of wear and replace it if necessary. A worn or broken drive belt can lead to the drum not turning. Check the belt for cracks or fraying and replace it if damaged; Always refer to your GE manual for specific replacement instructions or contact an authorized service technician for assistance. Ensure all repairs are done safely and correctly to avoid further issues.

Energy Efficiency and Cost Savings
GE clothes dryers are designed for energy-efficient operation, helping reduce utility bills and environmental impact through advanced settings and smart sensors that optimize energy use.
8.1 Understanding Energy Star Ratings
Energy Star ratings indicate energy efficiency, certified by the U.S. EPA. GE clothes dryers with this label meet strict energy efficiency standards, reducing energy consumption without compromising performance. These models often feature advanced insulation, smart sensors, and optimized heating systems. By choosing an Energy Star-rated dryer, you lower utility bills and minimize environmental impact. This certification ensures the dryer exceeds federal energy efficiency requirements, providing long-term cost savings and eco-friendly operation.
8.2 Tips for Reducing Energy Consumption
To reduce energy consumption, always run full loads, as this minimizes the number of cycles needed. Use the moisture-sensing feature to prevent over-drying clothes, which wastes energy. Select energy-saving cycles or lower heat settings when possible. Regularly cleaning the lint filter improves airflow, reducing drying time and energy use. Properly venting the dryer ensures efficient operation and prevents heat buildup. These simple practices lower your energy bills and extend the lifespan of your GE clothes dryer.
8.3 Using Moisture-Sensing Technology
GE’s moisture-sensing technology detects dampness in clothes and adjusts drying time automatically. This feature prevents over-drying, saving energy and protecting fabrics. It stops the cycle once clothes are dry, reducing wear and tear on garments and the dryer. This ensures efficient drying, preserves clothing quality, and enhances the longevity of your GE clothes dryer, making it a valuable feature for optimal performance.
8.4 Managing Load Size for Efficiency
Managing load size is crucial for optimal efficiency in your GE clothes dryer. Overloading can reduce airflow, leading to longer drying times and increased energy consumption. Conversely, underloading may not utilize the dryer’s capacity efficiently. Always follow the recommended load size guidelines in your manual. Proper loading ensures balanced drying, prevents damage to clothes, and maximizes energy savings. For best results, leave enough space for air to circulate freely around the clothes.

Warranty and Customer Support
Welcome to the GE Clothes Dryer Manual’s warranty and customer support section. This chapter provides detailed information about your appliance’s coverage, service options, and assistance resources.
9.1 Understanding Your Warranty Coverage
Your GE Clothes Dryer is backed by a comprehensive warranty designed to protect your investment. The standard warranty typically covers parts and labor for one year from the date of purchase. This includes repairs or replacements for defective components due to manufacturing issues. However, coverage may vary depending on the model and region. Warranty terms and conditions are outlined in your GE Clothes Dryer Manual, ensuring clarity on what is covered and for how long. Proper installation and usage are essential to maintain warranty validity.
9.2 Contacting GE Customer Service
For assistance with your GE Clothes Dryer, contact GE Appliances customer service. You can reach them via phone by calling their toll-free number, available Monday through Friday during business hours. Visit their official website for live chat support or to submit a service request. Additionally, email support is available for non-urgent inquiries. Have your dryer’s model and serial number ready to expedite service. For faster resolution, ensure you describe your issue clearly when connecting with their team.
9.3 Finding Authorized Service Providers
To locate authorized service providers for your GE Clothes Dryer, visit the official GE Appliances website and use their “Find a Servicer” tool. Enter your ZIP code or city to find certified professionals in your area. You can also call GE’s customer support hotline for assistance in locating a nearby authorized service provider. Always ensure the provider is GE Appliances Certified to guarantee reliable and warranty-compliant repairs. Having your dryer’s model and serial number ready will help expedite the process.
9.4 Online Resources and Manuals
GE Appliances offers comprehensive online resources to support your clothes dryer. Visit the official GE website to access downloadable PDF manuals, troubleshooting guides, and user instructions. You’ll also find FAQs, video tutorials, and interactive guides to help you understand and maintain your dryer. For convenience, bookmark the GE support page for quick access to information and updates. Use the search function to find specific topics related to your model, ensuring you get the most relevant and accurate information.